What is Direct Formatting?
Direct formatting, also referred to as local formatting, is what happens when you select a character, word, or paragraph and start using the formatting buttons on the Ribbon. Just about everybody does this, except professional writers and book designers. If you’re feeling particularly hateful towards book designers, this may be the fastest way to drive them to drink.
What are Styles?
Styles are predefined sets of formatting rules that can be applied to text in a document using Microsoft Word and most other word-processing or book layout software. Styles usually come in two types: character and paragraph.
An example of a character style would be bold or italics. It applies only to the selected characters.
An example of a paragraph style might be something like: BodyText, which I might define as a left-justified, double-spaced paragraph, the first line of which is indented by .5″, and which is followed by another Body paragraph. Or it might be a bulleted or numbered list item. It applies to a whole paragraph – up to, and including, the final paragraph mark: ¶ (a usually hidden, but important character in and of itself).
A style can contain a lot of information about how to format a piece of text.
Why Does It Matter?
When you apply a style to a piece of text, changes to the style will automatically update the appearance of any text to which you’ve applied the style. If you apply a whole new template, and have styles with names that match those in the old template, your formatting will be updated to match the style definitions in the new template. If a book designer opens your manuscript in another program, like Adobe InDesign, he won’t want to curse your name and secretly urge the book-buying underground to blacklist you.
Seriously, it is much, much easier to reformat or fix a manuscript that uses styles and never, ever uses direct formatting.
Fine, How Do I Use Styles?
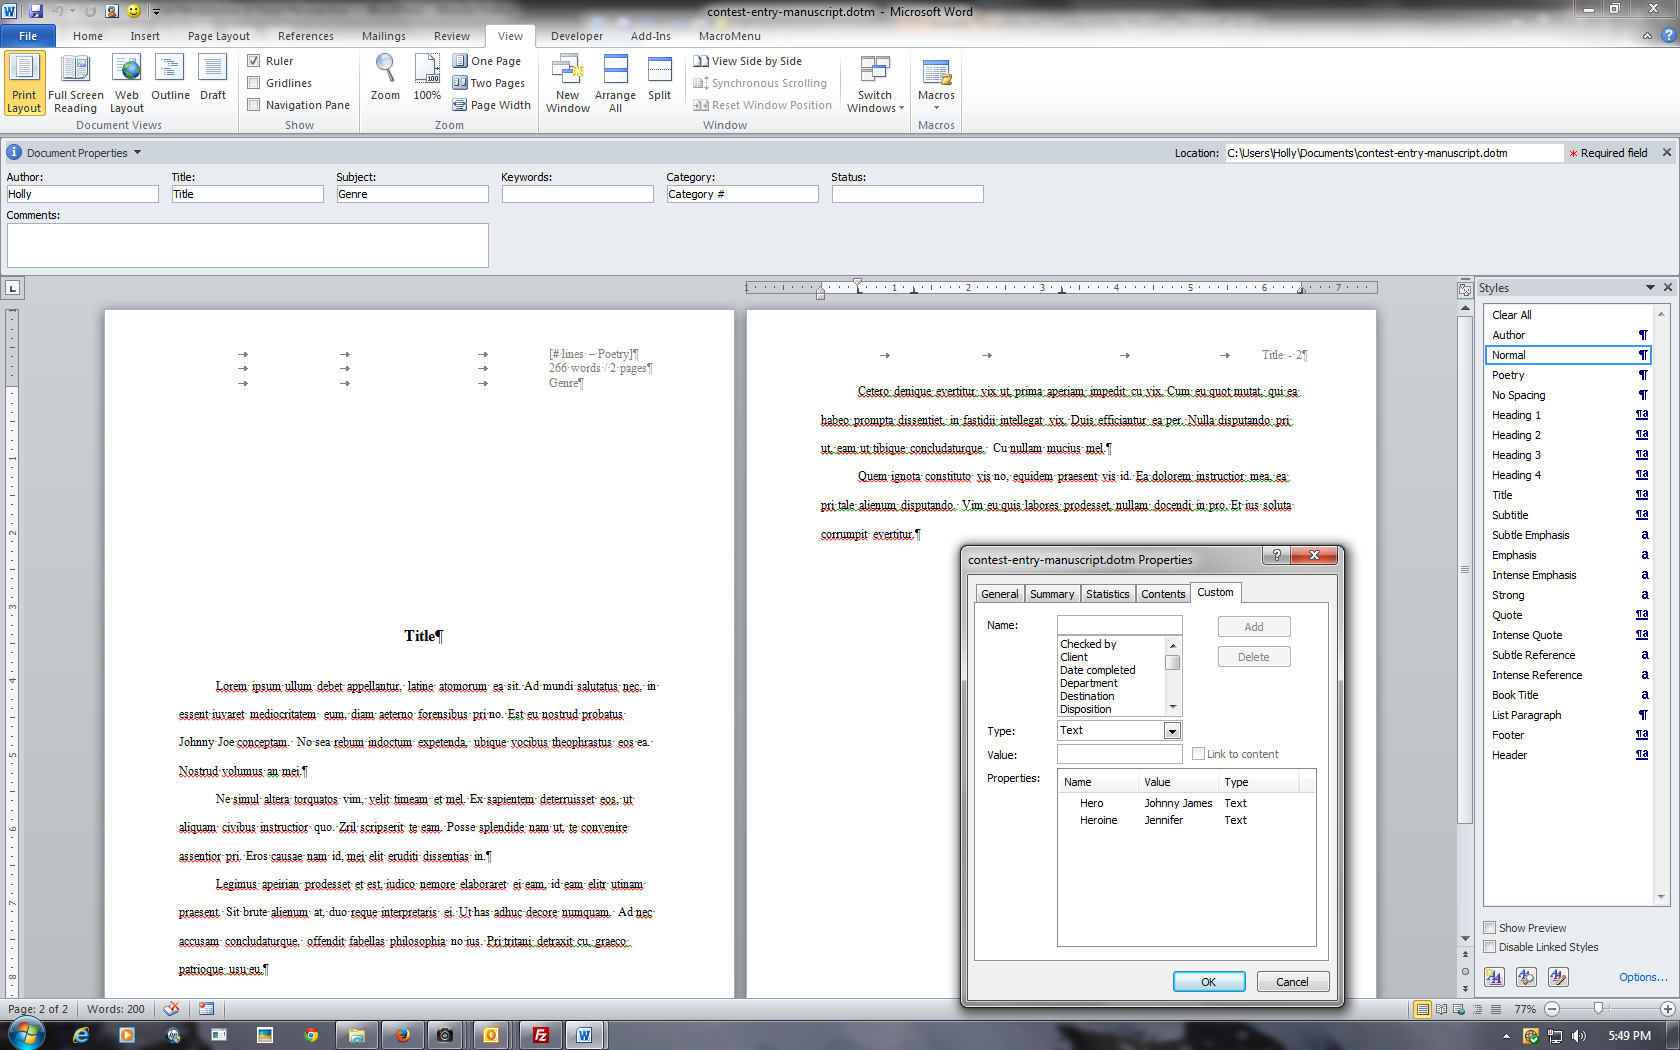
First, know where the styles appear in Word’s editing window. They may be in one or two places: the Styles area on the Ribbon, across the top and under the menu bar; or, the Styles pane (this appears if you click that little circled icon just below Change Styles, as shown below):

To apply a style:
- Highlight the word or paragraph in your document that you want to apply the style to.
- From the Styles area on the Ribbon, or the Styles pane (shown in yellow, above), click the name of the style you want to apply. (In the illustration, above, you can see that the style named Normal is highlighted in both the Ribbon and the style pane. Normal is the default style, and generally is the foundation for all other styles in the template.)
That’s it, in a nutshell.
I Don’t Like That Style – How Do I Change It?
If someone has given you a template and said, “Use this – do not deviate from it one iota!” then you don’t change it. I don’t care if it’s the ugliest thing you’ve ever seen, there’s probably a reason for it, and it would be better if you simply wrote your manuscript in Notepad than to go changing formatting willy-nilly. Just don’t do it. Apply the styles as described, above, then click Save as… and give the document a name. Submit it and try not to dwell on its ugliness.
On the other hand, if you want to make your own life easier – say, you want to create a template for the annual Christmas letter or set up a nice, industry-standard manuscript template or tweak one just a bit to suit your needs, then read on.
First, open the Styles pane. That’s the rectangular Styles list shown in yellow, in the illustration above. Below the list are three buttons:
- Add new style
- Style inspector
- Manage styles
Next, let’s modify the Normal style. Let’s say the default is Arial, and I want the main font to be Times New Roman.
From the Styles pane, click Normal. Click the drop-down arrow that appears next to Normal, then click Modify…


NOW you can use the direct formatting buttons – the ones in the Modify Style dialog! You are limited only by the bounds of good taste and your publisher’s guidelines.
To do more detailed formatting and to control every aspect of your style, click Format and go through any or all of the options below it: Font, Paragraph, Tabs, Border, Language, Frame, Numbering, Shortcut key, or Text Effects.
Be sure to click OK if you want to save anything you’ve done – and be sure to click it on each dialog before moving on to the next. Whenever you see Apply, that means, “Apply changes but stay on this dialog so I can change some more stuff.” When you see OK, it means, “Apply my changes and close the dialog; I’m done.” If you make a bunch of changes and forget that step, you’ll have to remember what you did and do it all over again later.
Now, any time you want text formatted that way, highlight the text and click the style name. It’s that simple.
About Normal (Based on and Style for following paragraph)
IMPORTANT NOTE ABOUT NORMAL STYLE: Look at the illustration above. See where it says Style based on: (no style)? Many styles will say Style based on: Normal. When you change Normal, you are changing any style that it is based on. You may not want to do that – or you may at least want to check other styles for unintended consequences. Depending on how the styles based on Normal are defined, you could be changing their underlying properties just by changing Normal. This can be true of any style – for each style in a document, it can be based on a style the template designer chooses, and it can define the style that is to follow it. This is a very useful, powerful, often misunderstood feature.
Think of it as an outline: Heading 1 is logically followed by Normal – or by a newly defined style such as BodyText (you can give your styles any name you like, provided you remember what they are for, later). The intro paragraph to a list might be ListIntro, and it would always be followed by ListItem1, which would be followed by ListItem. (You might want to define a ListItem1, for example, if you defined the style to restart list numbering at 1.)
Style Inspector
Want to know what styles are applied to a piece of text? Highlight it, then click that middle button – Style Inspector – below the style names.

In the example, above, the paragraph style is Heading 1. The character style applied to the word “critiqued” is Subtle Emphasis (also highlighted in the Styles pane to the right). You’ll see it says “Plus: Not Bold” which means that I clicked the direct formatting B (or Bold) button, and removed the bold character formatting defined in the style Heading 1. A character style can be applied on top of a paragraph style. Direct formatting gets applied on top of all the styles. Remember, the direct formatting (Plus: Not Bold) should never be used – if I wanted to do that, I should set up a new style for it.
One easy way to do this is to go ahead and apply that direct formatting (I know, I know – I said “never,” but go ahead, just this once). Now, then click the New Style button. Make sure that you choose the right type – character or paragraph. Give it a name. Click OK. Highlight the direct-formatted text, click the new style name, and click the down arrow. Choose Update [stylename] to Match Selection.

One of the best ways to learn is to play with the features I’ve described here.
Create a new document (Click File > New).
Click File > Save as… From the Save file as type: drop-down, choose Word Template. This will be a .dot (compatible with older versions of Word); .dotx (newer versions of Word); or .dotm extension – your choice, depending on your version of Word and whether you want to include macros in it.
Now, modify Normal style, then click the New Style button and create a brand new style using all the attributes available to you under the Format button. Click OK. Practice applying styles. (A template file is no much different from any other Word document, except that it gets saved in the templates directory by default, and you can choose to base new documents on it, when you create them, so they’ll start out with all your defined styles already built in!)
You can include headers and footers in your template, too, so that you don’t have to set them up again.
You can use fields, including any custom fields you create and save in your template, to make headers, footers, and provide additional info (perhaps your name, address, phone number, and email address). Enter these things once, in your template. Format them. Save the template and they will appear in any new document that is created and based on this template. Like magic!
See How to Create Custom Document Properties in Word 2010 for more ideas, and even a sample template and document!
If you’re happy with the styles you’ve defined, during practice, save the template file. Go to File > New and create a new document that’s based on this template (click My Templates to find it).

Create some text, apply the styles, and if everything looks the way you intended it to, you have just created (or modified to suit yourself!) a template. Here’s what the template I created a few days ago looks like:
Contest Entry Manuscript Template (.dot version for those still using older versions of Word) – note that this one doesn’t include and won’t support macros described in How to Create Custom Document Properties in Word 2010.
Now, please use it and feel free to modify it to fit your needs. No more of that direct formatting nonsense!


You know, Holly, I knew about styles. But, to be perfectly honest, I never used them. And, now I realize I’ve been wasting a lot of time. Not only for my books- but our corporate reports, and client documentation. This will save a lot of time- and insure consistency.
Thanks for making it clear to me!
Good! I’m glad you found it and it’s helpful to you. Yes – consistency (not to mention the ease of changing styles later if you want to apply them consistently throughout the book!) is why it matters so much.
I see that you can save a set of styles in a template file — can you then later apply a template file to an existing document, or must you start from File>New From Template to use your set of styles?
You can, although sometimes it’s easier to do File > New and just copy all the text over from a previous doc.
To copy styles from another doc, you’ll want to open both documents. Then, in the Styles pane, click Manage Styles (third, or rightmost, button towards the bottom). Click Import/Export. From the Organizer dialog, select one document under “Styles available in” and the other document under “Styles available in” on the other side. At that point, you should be able to copy styles back and forth. When done, click Close.
I can write this up as a tutorial if need be, but it’ll be a few days.
Hi Holly
I’m back here 🙂
I’m starting something from scratch – a 5 x 8 book. I am just setting the page margins. Is the Mirror margins at Page Setup the right way to do it? And what are the ideal margins?
Thanks!
With a book that small, I think .5 – .75 should do it – maybe .5 for the top, bottom, and outer edges, and .75 for the gutter (binding edge). And yes, use Mirror Margins if you have a gutter. (You want the margin wider where the binding is, because you don’t want the text obscured by it.) Try it and see how it looks. Some of that depends on your typeface and size.
So that is what a gutter is for! 🙂
Thanks!
I hope I can get better at this styles thing
Did you lose the template I made for you?
I still have it. I just want to start from scratch, so I will be able to understand it better 🙂
Good! I admire that. But you can use a copy of the original when you get stuck, to see how things work – and modify it to fit your needs. I remembered us talking about the margins, and think that was set up the way I’d recommend it, still, today.