If you’re not a poet, you may still find this useful – and you’re more than welcome to give it a try!
If you are writing for yourself, only, and not for publication, you can mostly ignore my advice about formatting everything in Times New Roman, 12pt, 1″ margins all around, blah blah blah… but trust me when I say that if you hope anyone but you will ever publish your work, you’d best get disciplined about reading submissions guidelines, first, and if they don’t explicitly specify formatting requirements, it’s Times New Roman, 12pt, 1″ margins all around. Don’t bother arguing about how it “looks prettier” with some other font – arguing this point will only get you labeled “argumentative, difficult to work with.”
Got that? If yes, you’ve probably just climbed over the backs of 70% of submissions and increased your odds of publication with that tip, alone. Here’s a freebie for you:
This zip file contains a Microsoft Word Template (there’s a macro in there – it’s supposed to be in there – so if your antivirus or your Microsoft Word throw a fit, it’s your choice but I’d allow it if you like writing acrostic poetry). The zip file also contains a little htm document that you can run on your local drive to prep a poem for posting on Facebook. It’s not perfect, but it does a better job when copy/pasting of keeping your line breaks and horizontal spacing than just copy/pasting straight from Word. If it’s helpful, you can thank Dossy Shiobara for it. (You can open it in a text editor like Notepad to see what it does. It’s not particularly fancy and contains nothing “dangerous.”)
A member of The Stafford Challenge (2025 Cohort) asked, this morning, about organizing poems. I have tried numerous approaches, but the one that works best for me is to keep each years worth in a single Microsoft Word document. It is a very simple document: there is a Table of Contents (automatically generated from headings, of course – do I look like I have time to manually update page numbers??) and each page has a PoemTitle (a style I created: TNR + bold, 12pt.) followed by PoemBody (TNR, single-spaced lines). That is it. Oh – I got fancy with headers but there’s really no point since they don’t carry over when the document is split for publication.
You’re not going to submit 300+ poems to any journal all at once, surely. So rather than get in there and tediously make individual poem files one at a time, why not just collect them all and periodically extract them from the big file as individual files – in bulk?
How to Split a Microsoft Word Document into Individual Documents
You MUST use Heading Styles. In the following instructions, my poem titles are all set to a custom PoemTitle style, which is defined as a Level 1. (Heading 1 is, by default, defined as Level 1. You can define your own styles to be any Level you want them to be, and can then include or exclude them from your Table of Contents and Indices and format them any way you want to.)
IMPORTANT: The following instructions will create individual files which will be linked to a single Master Document. Use of Master Documents in Word is tricky and not recommended except for accomplishing a particular task (like creating individual files from a single large document). In fact, I’m going to strongly suggest that you first create a special folder on your local hard drive for this project, then put a copy of your large Word doc into it. Do not touch the original document for the rest of this exercise! Always, always, always have at least one backup of your work.
- Read the previous paragraph twice. When you have done that, you should be ready for the next steps.
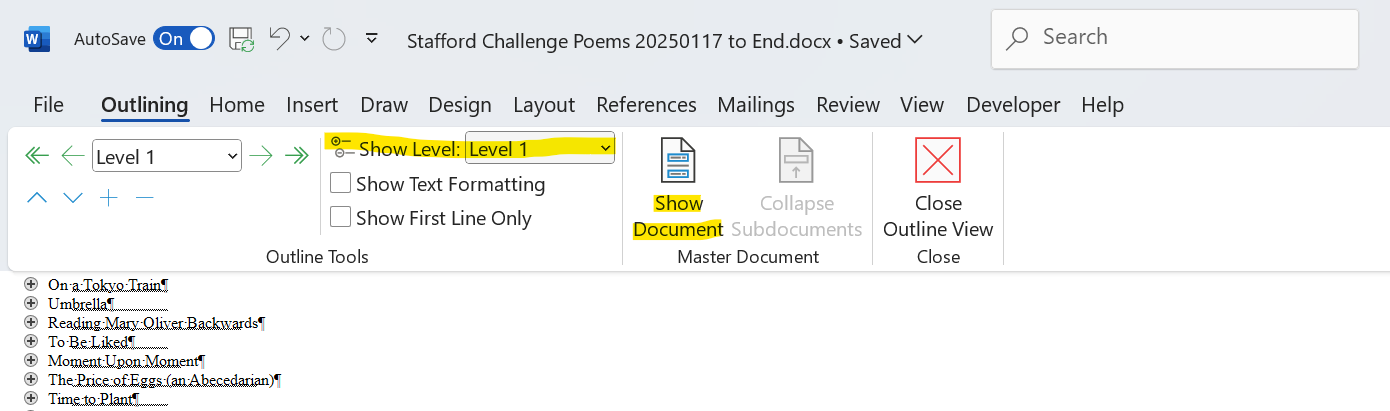
- From the Word menu, working in your new copy of the original, select View > Outline.

- From the Show Level: drop down menu, select Level 1 (or whatever you’ve defined as your PoemTitle), then click Show Document.

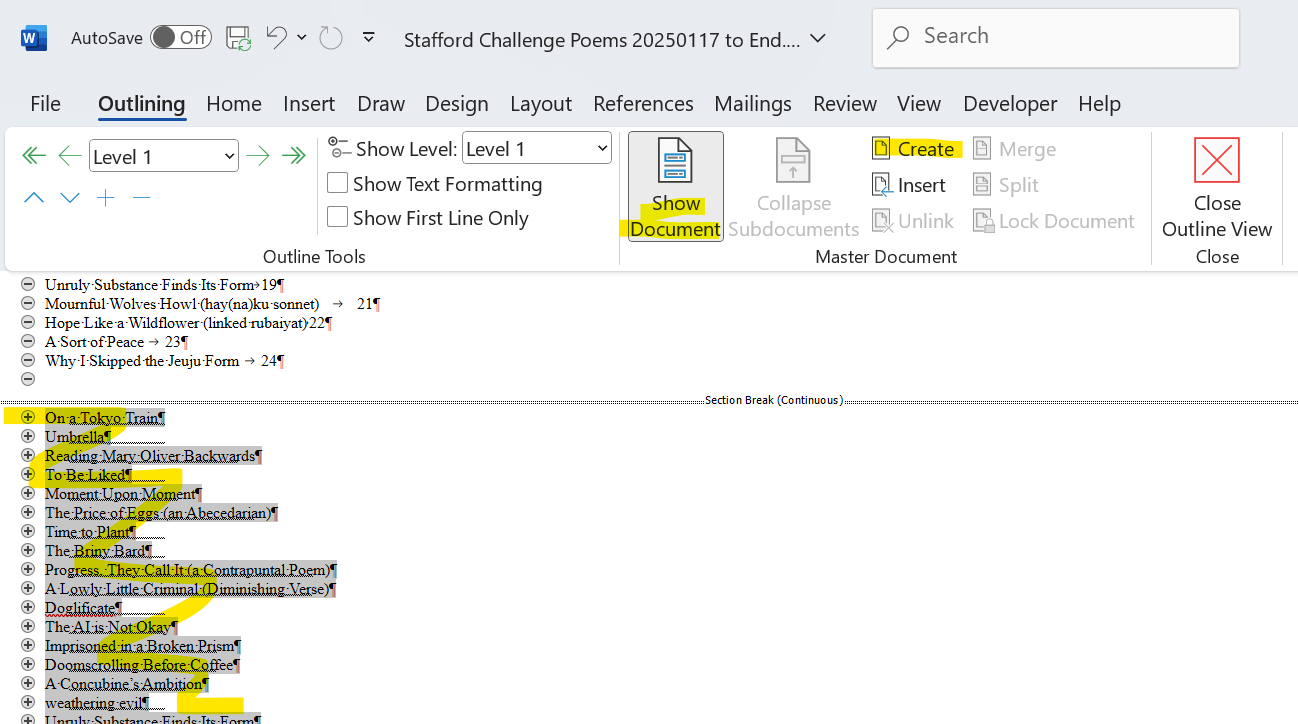
- Select the headings (as shown below) that you want to save as individual documents. DO NOT SELECT THE TOC HEADINGS. In the Master Document section of the Ribbon, click Create.
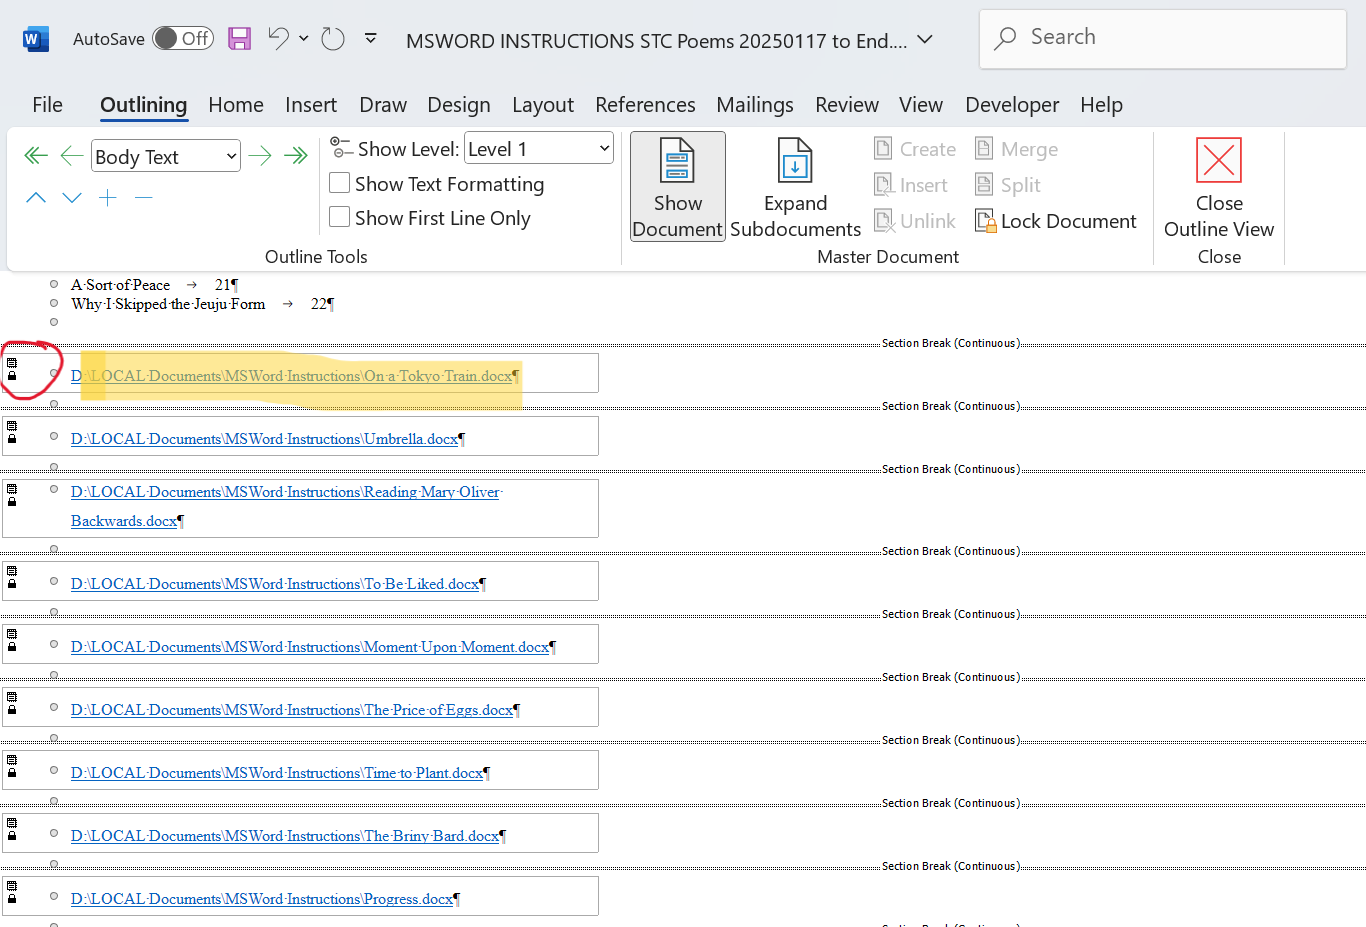
- You will see something like this:
- You can double-click the document icon (circled in red) or CTRL+right-click on the file location to open the individual file (now known as a “subdocument”). You can use File Explorer to go to the location (highlighted above in yellow). If you see text instead of a file folder location, toggle the Expand/Collapse Subdocuments button shown on the Ribbon.
NOTE: Microsoft Office stores temporary cached files in a folder called: \AppData\Local\Microsoft\Windows\INetCache\Content.MSO

If you are working on a large file stored on OneDrive or other cloud storage, this is probably where the embedded, individual files are located. Moving them will destroy the integrity of the master document, which is why I recommend doing this only on your local hard drive. If working from a folder on your local hard drive, the individual files should be automatically created and saved for you in the same folder – this is much easier to deal with.
If you move these documents or rename the folder, all the links will be broken and your Master Document will be empty. You can always insert them, one by one, but this is tedious and not worth your time. My recommendation is to delete the Master Document (keep those individual files you created!) and repeat this process as needed to create individual files from a separate, large document. Remember: always work from a backup copy.

0 Comments